Firebase Configuration
Get started by creating a new Firebase project or use an existing project that you already created for your app.
Simply specify a name and the default options to get started with a new project.
If you have a blank new app you should now see
Get started by adding Firebase to your app
in the dashboard of your app, otherwise you can also
simply click the gear icon and move to the
project settings from where you can also
add an app.
The dialog looks basically the same for both iOS and
Android like in the image below, and the only import
thing here is to use your package id for
the apps!
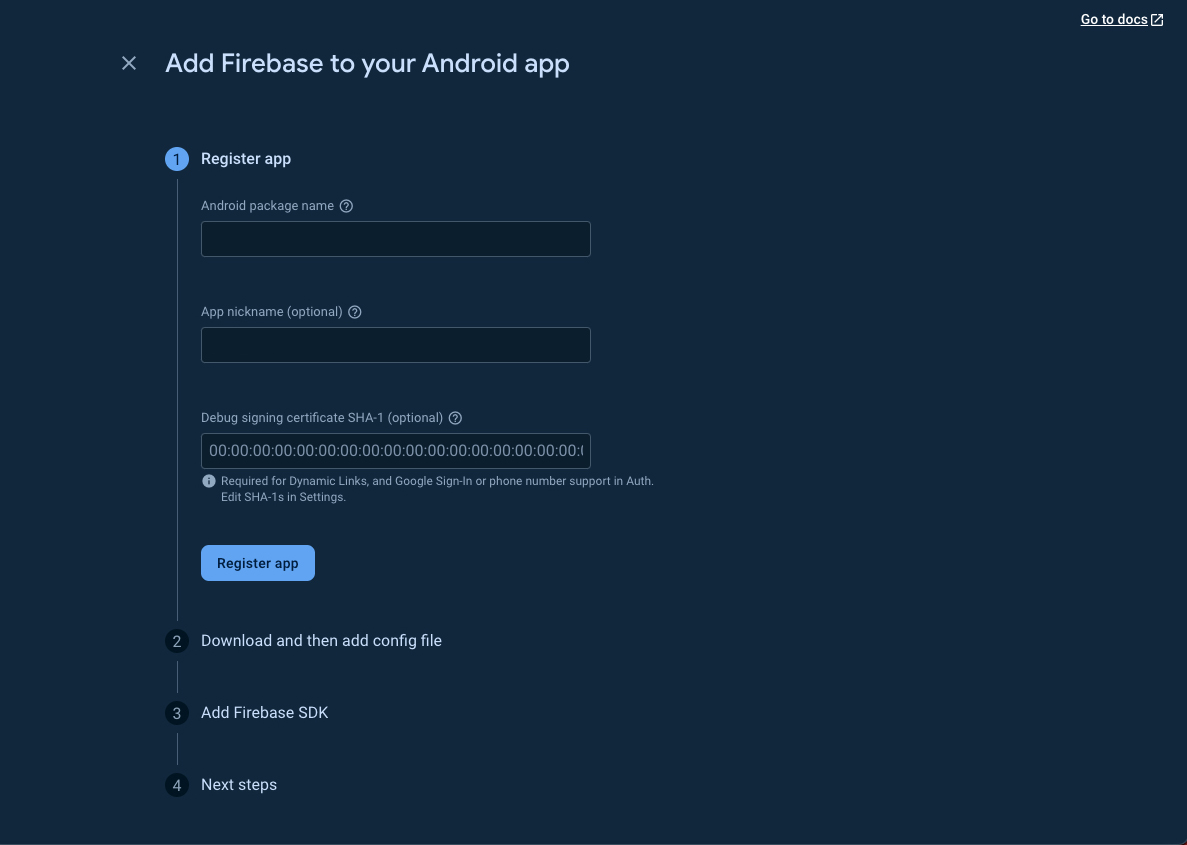
After the initial step you can download a file, which you can for now simply download anywhere. The files are:
-
google-services.json- file for Android -
GoogleService-info.plist- file for iOS
Now we can configure our two platforms, for which one is a lot easier..
Android Push Preparation
There is only one thing to do for Android, and that’s
moving the google-services.json that you
downloaded to the path
/src-capacitor/android/app/google-services.json
Really that’s all, you could now start to send out push notifications to Android devices but we also want iOS, which takes a bit more time.
iOS Push Preparation
This part is going to be a lot more complicated. First of all, you need to create an App ID for your app within the identifiers list of your Apple Developer account.
Maybe you’ve already done this for your app, if not
simply add an app and make sure you select the
Push Notifications capability from the
list!
The Bundle ID here should be what you
used before as your App ID within Capacitor and
Firebase.
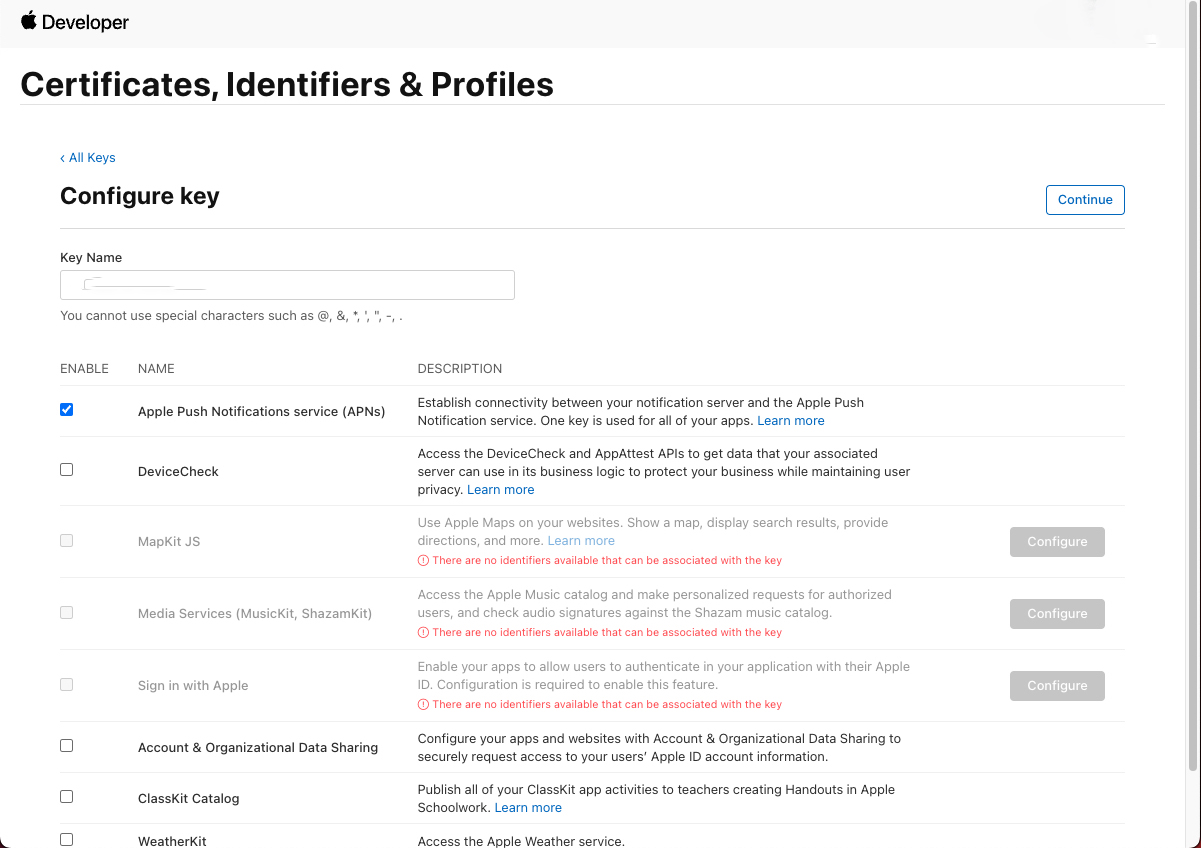
Now you could create a Certificate for push
notifications, but the easier way is actually to
create a Key instead.
So create a new key and enable the
Apple Push Notifications service (APNs).
If you have already reached the maximum amount of
keys, you can also use an existing key or use a
certificate instead, but the process then is a bit
more complicated.
After downloading this .p8 file, we need to upload it to Firebase.
To do so, open the Cloud Messaging tab
inside your Firebase project settings, upload the file
and enter the details for the Key ID (which is already
inside the name of the file) and your Team ID from iOS
(you can find it usually in the top right corner below
your name).
Now we need to copy our
GoogleService-Info.plist that we
downloaded in the beginning from Firebase into our iOS
project, and moving to the path
/src-capacitor/ios/App/App/GoogleService-Info.plist